
From pocket door to flush door
With the conversion kit, the pocket door frame you have already built in becomes a frame for flush sliding doors: no jambs and no architraves, the door disappears into the wall flush with the plaster. These are the 7 steps of the FIP installation sheet.
- 7 steps
- 10.5–11 cm thick wall
- 0 architraves
The kit is right for you if
You already have the pocket door frame
The kit is fitted on a pocket sliding door frame already built in, in a wall from 10.5 to 11 cm thick.
The sheet does not list the tools. If you are not sure how to cut the wood or the plaster of your opening, message us before you start.
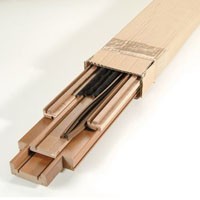
What's in the kit
- PVC jamb frame, with fibreglass mesh for skimming the plaster
- White anti-noise seals, which the door closes against
- PVC brush holders, with plaster mesh
- White brushes, which adapt to the door
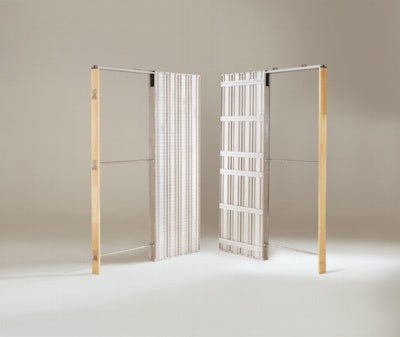
The pocket door frame
You start from the pocket door frame that is already built in: part of the wooden edge frame has to be removed, so that the wood is not left visible afterwards.
- 1
See what your pocket door frame looks like
The pocket door frame already built in on site looks like the drawing: the box the door slides into and, on the edge of the opening, the edge frame, which is usually wooden.
- 2
Remove part of the edge frame
On the pocket door frame already built in, remove part of the edge frame, which is usually wooden.
- 3
Do it on both sides Caution
Repeat on both sides of the wall so that the wood does not remain exposed afterwards: this prevents cracks.
The plaster
- 4
Trim the plaster
Remove part of the plaster.
Door and profiles
- 5
Insert the door panel
Fit the door panel in the pocket door frame.
- 6
Insert the PVC profiles
Insert the kit's PVC profiles with the plaster mesh sticking out onto the wall: this is the fibreglass mesh the plaster grips onto, so that it does not flake off.
- 7
Plaster flush
Plaster flush with the profiles, covering the mesh. There is your flush sliding door: no jambs and no architraves. Profiles, seals and brushes can be painted the colour of the wall and of the door.
The kit and the pocket door frame
Message us while you convert the door
Send us a photo on WhatsApp of your opening or of the point where you stopped: we'll tell you how to carry on. You'll find all our other installation instructions under Technical support.


